A quick scroll through Instagram and it’s obvious that videos are dominating. In fact, since Instagram rolled out video its engagement has grown by 53% – that’s outpacing photos! But there’s one type of video in particular that Instagram users continue to love: GIFs.
GIFs, which stands for Graphics Interchange Format, are essentially image files that move. While some social media marketers are quick to brush off GIFs as a fad, the stats tell another story. Giphy, arguably the most popular website for creating GIFs, serves more than one billion users daily. This explosion in GIF popularity is a great opportunity for brands and businesses on Instagram.
But how do you make a GIF? While there are a ton of free apps and websites out there, my favorite way to create GIFs is with Canva. Check out how in just a few minutes Canva can help you create engaging, high-quality GIFs for your brand.
What is Canva?
For those who don’t know, Canva is an online design platform. With over 10 million active users, it is quickly becoming the go-to platform for social media marketers and brands. Canva does offer a free subscription, but in order to create GIFs you will need to have a Canva for Work account, which is a reasonable monthly subscription.
While the GIF generator is still in the testing phase, I anticipate it will roll out to a wider audience soon.
How to make a GIF
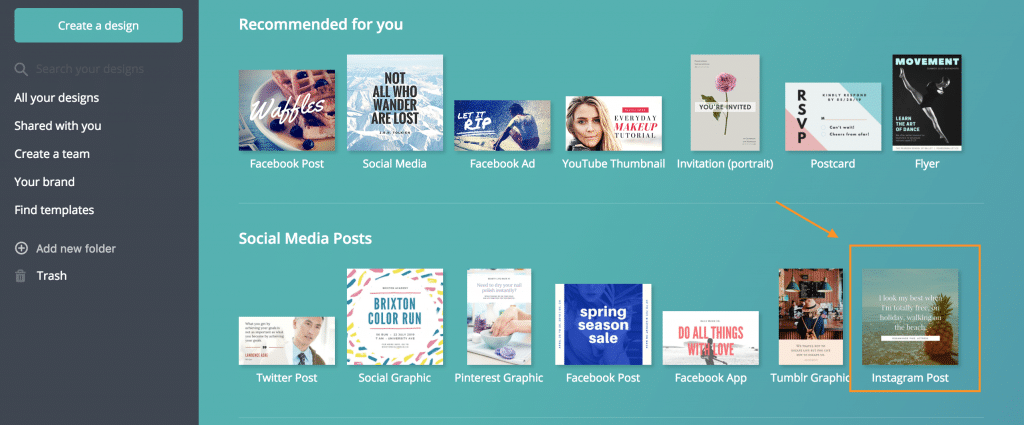
#1 First, you’ll want to select your preferred social post. In this case, it’s Instagram.
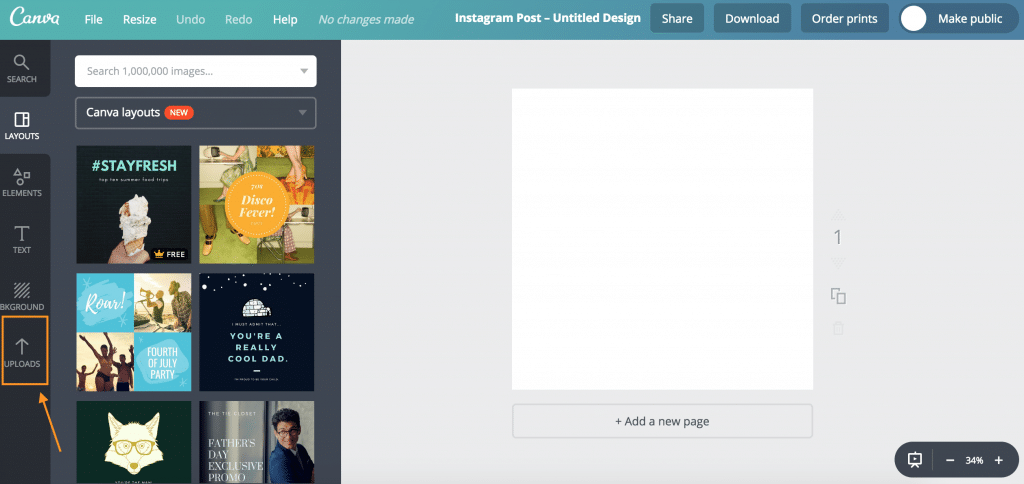
#2 Upload the image you want to use.
#3 Resize and crop it to your preferred size.
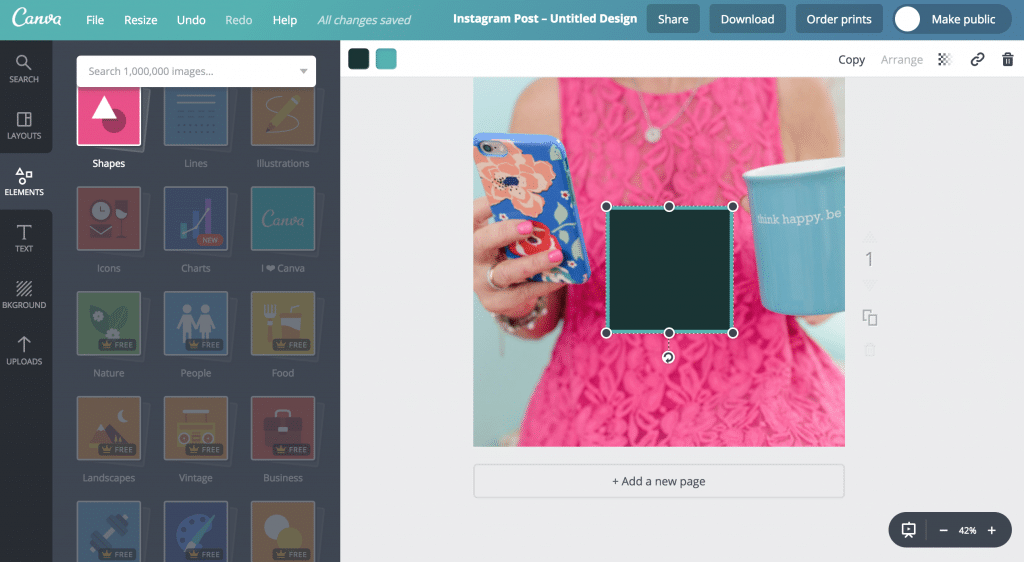
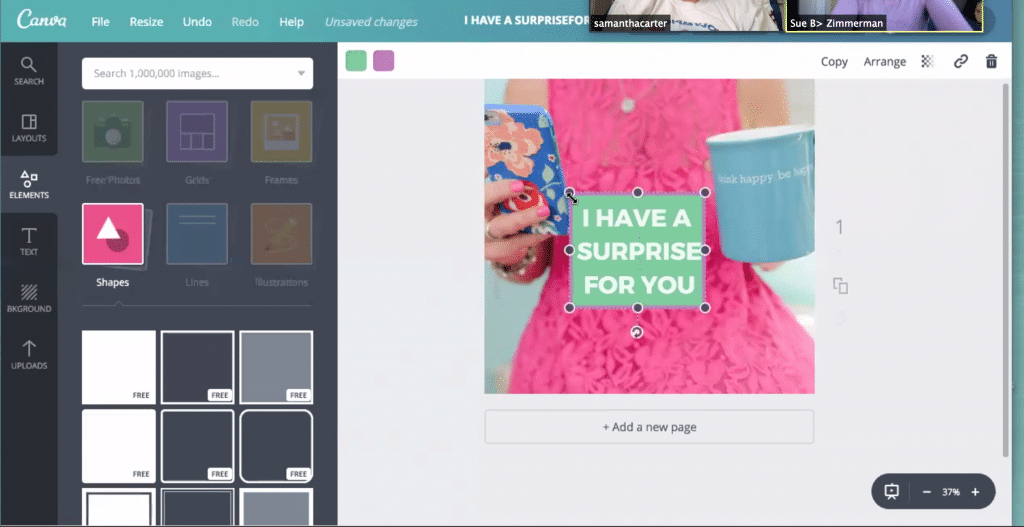
#4 Since this is a GIF, your image will need to have multiple layers. Click on “elements.” Pick your preferred shape. You can then drag the corners to resize.
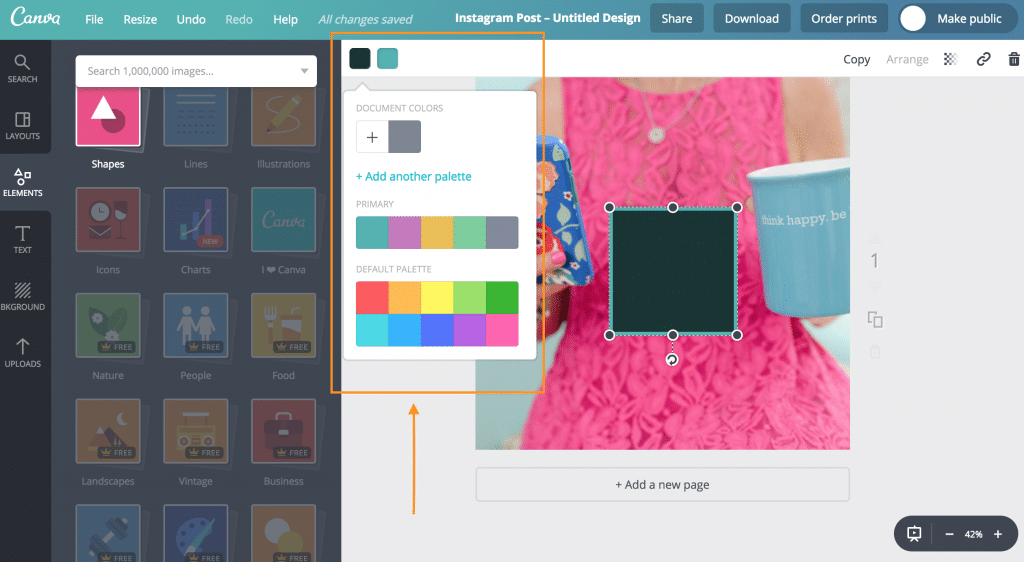
#5 Once that’s done, you can change the shape’s colors.
#NinjaTip: Add your brand’s colors to your Canva primary color options. This will help you to remain within your brand’s guidelines and make it easier to stay consistent no matter which Canva graphic you make.
#6 Click on “text.” There are a lot of text options, but remember that if your brand typically uses one type of font, you’ll want to remain consistent and use that on the GIF.
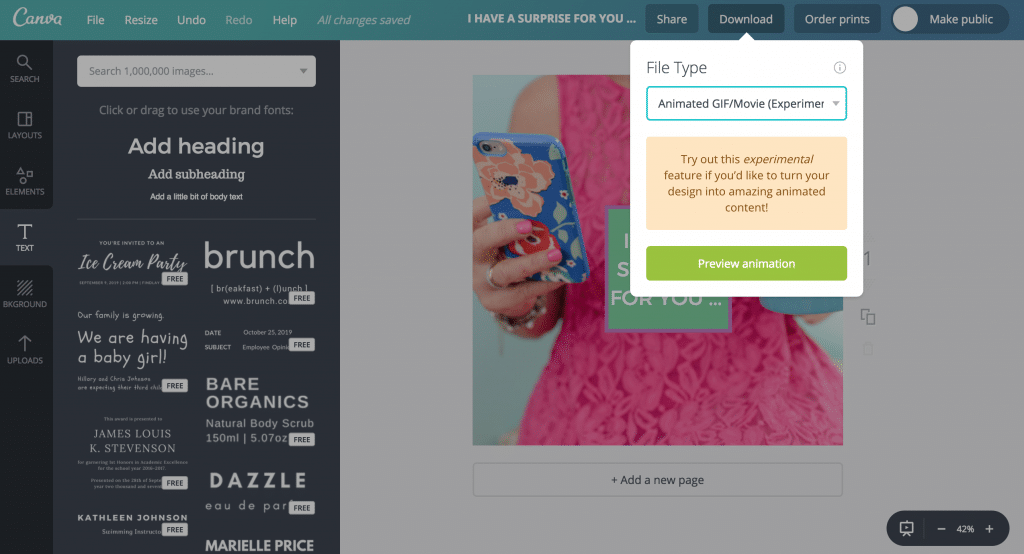
#7 Once your graphic is done, click on “download.”
#8 Select “Animated GIF/Movie.”
#9 Now preview and pick your preferred your animation style. Click “download as GIF.”
That’s it – yes, it’s that easy!
Convert GIF to video file
The last thing you’ll need to do before you can post the GIF on Instagram is convert it to a video file. No worries, there are a ton of apps out there that make it easy. I prefer to use GifLab. It’s recommended by other websites, like Mashable, and is one of the more professional GIF apps available.
#1 Make sure you’ve downloaded your GIF to your phone’s camera roll.
#NinjaTip: I use Dropbox to organize all of my Instagram content, including videos and GIFs. It makes it much easier to access and saves me a ton of time.
#2 Once you’ve opened the app, click on “GIF to Instagram.”
#3 Select your GIF file
#4 Adjust your playback speed. Keep in mind, your video must be at least three seconds to share on Instagram.
#5 Click on “save and share on Instagram.”
#6 Once the GIF opens in Instagram, you can add your caption and hashtags like any other post.
Think outside the content box
Instagram knows that people want to see videos – and lots of them! Whatever type of video you share, remember to always post with intention. GIFs are great to include in your content strategy, but they won’t mean anything if they don’t reflect your brand’s mission or focus.
If you’re still stuck on how to post with intention on Instagram, be sure to download my free Instagram Strategy Guide.
SaveSave

