Are you looking for ways to increase your visibility online so you make sales faster? Well, you’re in the right place.
Today, we’re diving into the world of Instagram location tags. We’ll be covering how to add location to your posts and use them to increase your ability to be found by new people on Instagram. Whether you’re a seasoned pro or just starting out, stick around because we’ve got some powerful tips in store for you.
Make sure to connect with us over on Instagram @TheInstagramExpert, where we share tips and insights daily. If you are someone who’s ever felt a little overwhelmed by social media, don’t worry, we’ve got your back.
What’s in this blog post:
- Definition of Geo Tagging
- How to Add Location to Your Instagram Post
- Misconceptions
- How to Update Your Privacy
- Searching By Location
- Next Steps
Definition Of GeoTagging
Location tagging, also known as geo-tagging, is simply the practice of adding a specific location to your Instagram posts. It’s putting your business on the digital map. When you tag a location, your post appears in the location feed. I like to call it the “location hub” – A spot where you can see a collection of all the posts that have that location or hashtags added to it.
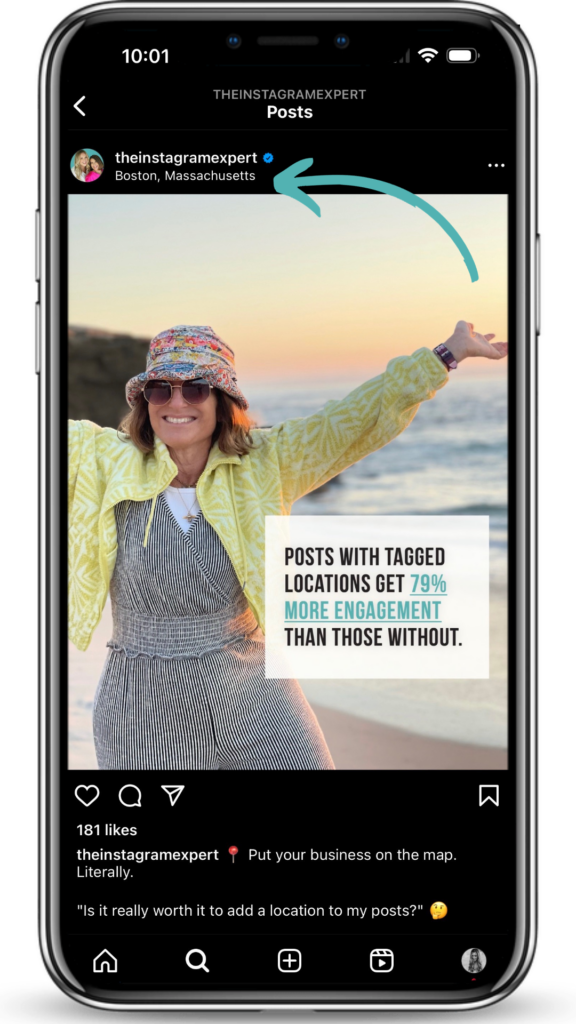
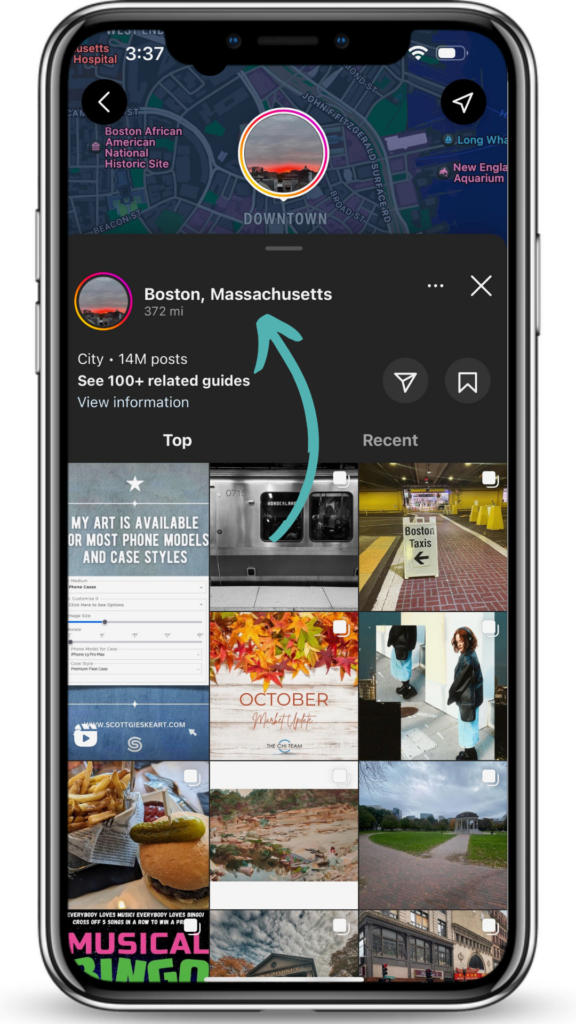
With the location tag added, potential customers in your area or visitors to that location can stumble upon your content and discover YOU and your business. It also can help your followers find you easier. Either because they understand that you live in or are located in the same place which offers connection…or because the location tag encourages them to visit your store or attend local events you are at.
And that’s not all. Your posts also have a better chance of showing up on Instagram’s Explore page when you tag location. This means increased exposure and reach to a broader audience.
How To Add Location To Your Post
So now that you know why you want to add location, here is how you do it.
When you’re creating a post, after you have selected the photo or made the video, and you are on the page where you write your description…you’ll scroll down. There you will see an option to ‘Add Location.’ When you click that you will have the ability to search for a location. You can choose from a list of suggestions or search for a specific place.
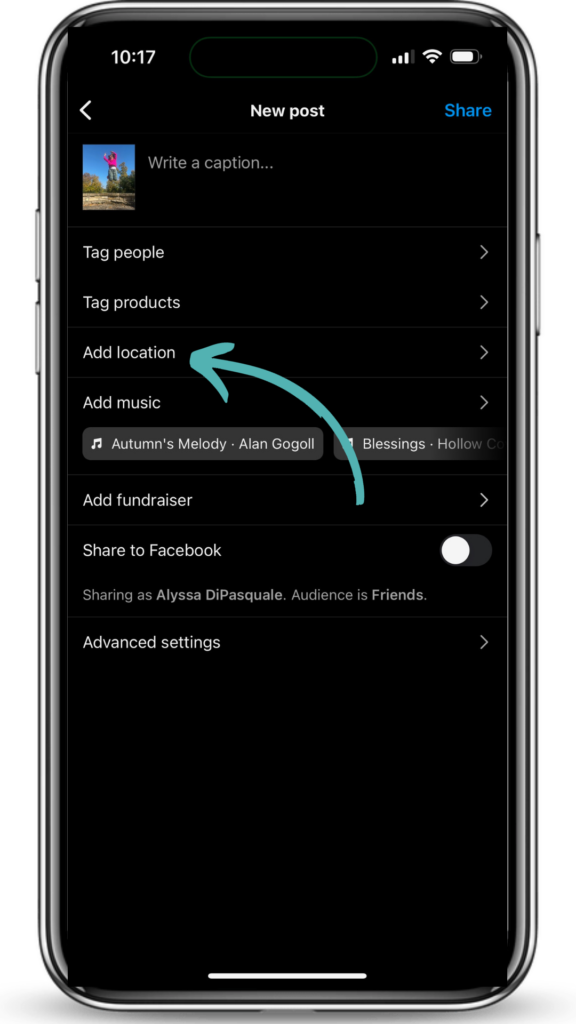
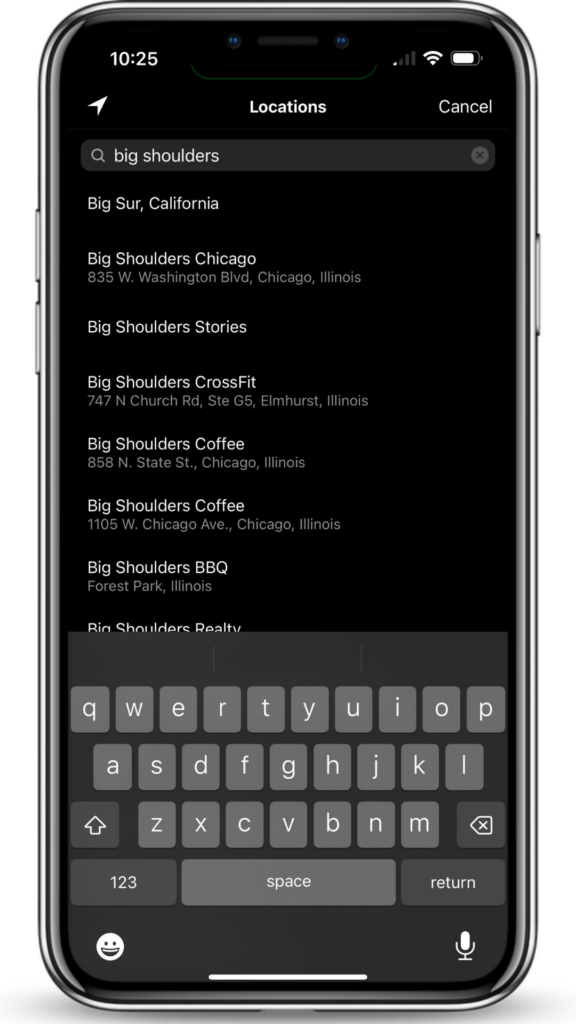
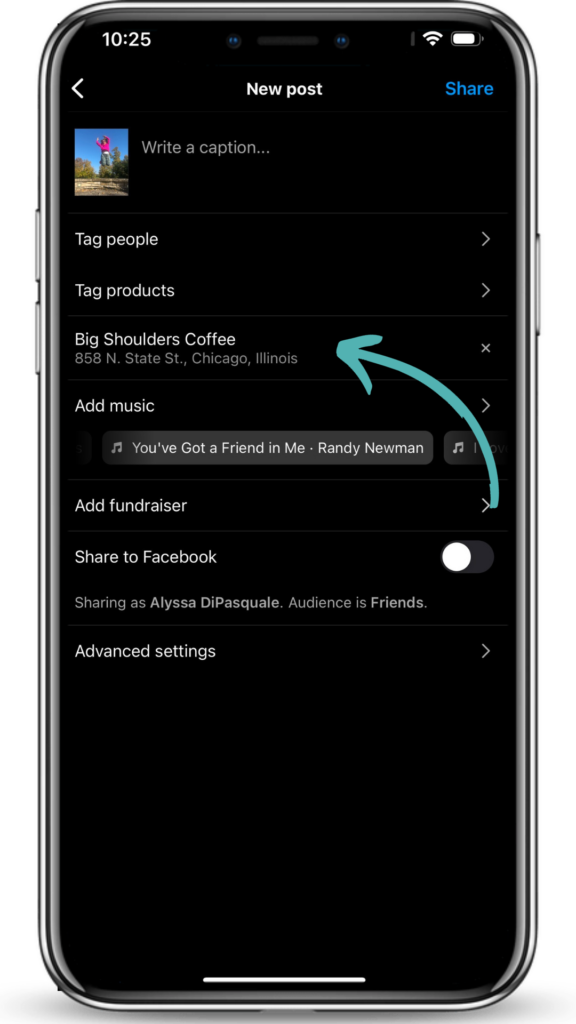
This can be your business location, a popular landmark, or even a local event that may have an audience similar to yours.
Once you’ve added the location, your post becomes visible to anyone searching or following that location!
When you’re posting content related to a specific location, always tag that place. It could be a business address, an event venue, or a city hotspot.
Also, consider geo-tagging when you’re participating in local events or collaborating with other businesses. It’s a fantastic way to cross-promote and reach a broader local audience. Because people who go and look at that location hub will discover you.
Misconceptions
One being, that it is only for physical, brick-and-mortar businesses. That’s simply not true. While it’s great for local businesses, anyone can use geo-tags to increase their visibility.
You can geo-tag when you are at a specific event or conference, when you are traveling , or just your hometown as a way to have more visibility.
Another misconception is that geo-tagging poses privacy risks. Some worry that sharing their location makes them vulnerable to unwanted attention. However, Instagram gives you control. You can choose who sees your location-tagged posts—everyone, your followers, or a select group of people. (Step by Step instructions on this below.)
Or you can post with location tags after you have left a location, you do not have to be in the place in order to use the tag. Plus, geo-tagging doesn’t have to be super precise. You can tag a city or neighborhood without pinpointing your exact location. It’s all about finding the balance between engagement and privacy.
How to update privacy settings for Geo Tagging:

1. On Instagram, you can control who sees your location-tagged posts by adjusting your privacy settings. Here's how you can do it:

2. Open Instagram: Launch the Instagram app on your mobile device.

3. Go to Your Profile: Tap on your profile picture or icon in the lower right-hand corner of the screen to access your profile.

4. Access Settings: On your profile, tap the three horizontal lines in the upper right-hand corner to open the menu. From there, select "Settings."

5. Privacy Settings: Under the "Settings" menu, tap on "Privacy."

6. Privacy Settings for Posts: In the "Privacy" menu, you'll find several options. Look for "Posts" and tap on it.

7. Edit Your Posts Settings: Here, you'll see a section called "Story." This is where you can configure your location settings. Tap on "Story."

8. Choose Your Audience: You'll see options to select who can see your location-tagged posts:

9. Everyone: This means that anyone on Instagram can see your location-tagged posts.
People You Follow: Only people you follow can see your location-tagged posts.
Off: This option disables location tagging, so your posts won't include location information.


10. Select Your Preference: Choose the option that aligns with your privacy preferences. If you want more control over who sees your posts, consider selecting "People You Follow" or "Off."

11. Save Your Changes: After making your selection, be sure to save your changes by tapping "Done" or the equivalent option on your device.

Keep in mind that these settings apply to new posts. If you've previously tagged your location in posts and want to change their visibility, you'll need to do so individually by editing each post's settings.
Searching By Location
Now, let’s talk about the flip side, because there is another great opportunity that location tags offer, which is viewing posts by location. This can open up new doors of opportunity for networking and connecting with new customers, or can help you find user generated content.
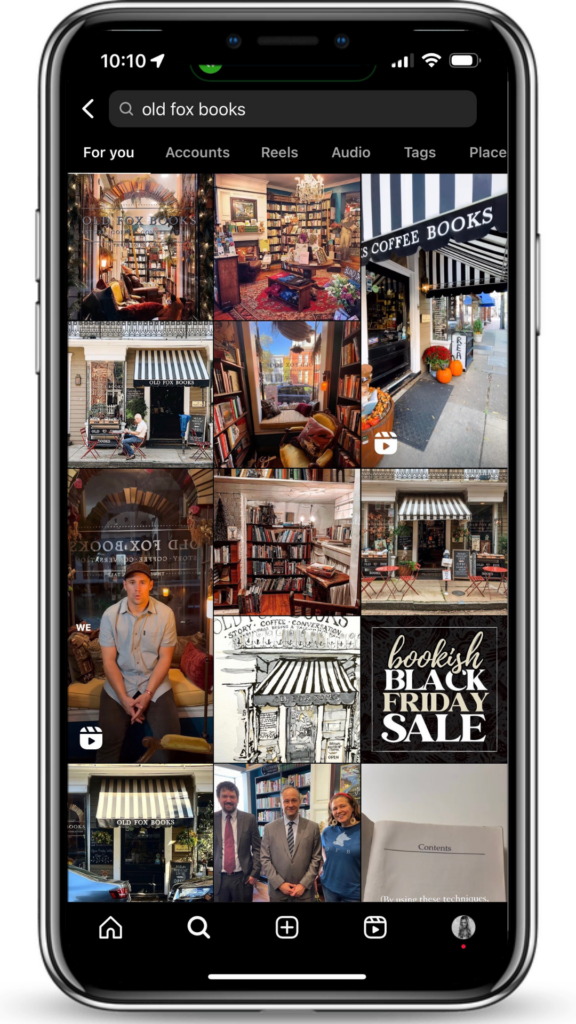
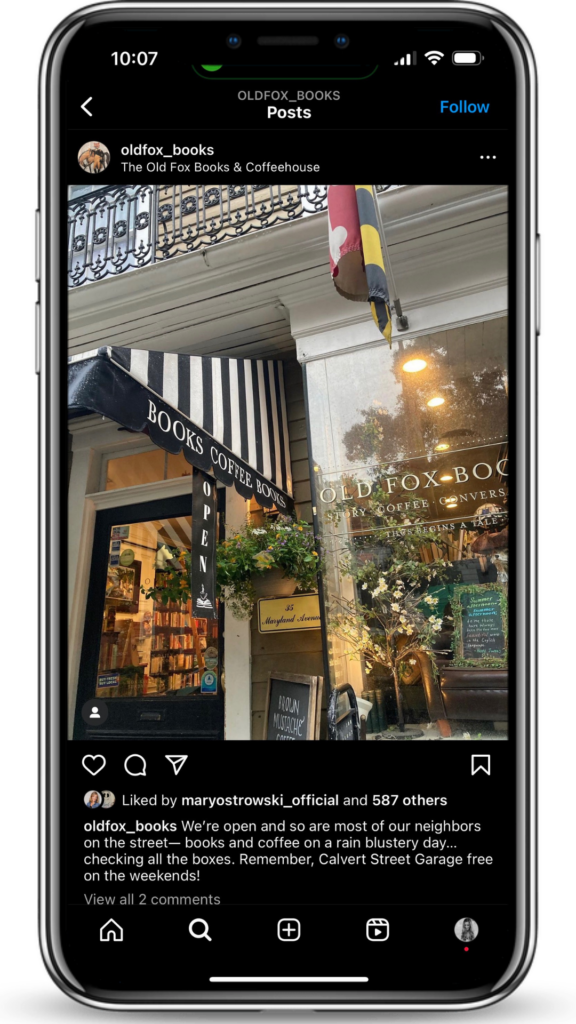
So, if you’re a local business, you can search for posts made in your area. You may find posts created by your customers that you could share as user generated content. And you can connect with them, engage with them, leave thoughtful comments, and build relationships.
And if you’re looking to connect with others in your niche, try searching for relevant locations. So if you are a health coach you can search from yoga studios, health food stores or even retailers like Athleta or LuluLemon. That could mean engaging with posts from people who share your interests.
Next Steps
Now If you want to get more followers and buyers on Instagram, we’ve got you covered with next steps.
Register for our FREE TRAINING and Discover How To Use Our Little Known System To Get Customers From Instagram In Just A Few Hours Per Week…Without worrying about: Looking like a total beginner and “saying the wrong thing”.
So, if you’re ready to elevate your Instagram presence, click the link above to register!
Remember, it’s all about connecting, engaging, and building your community. Start using locations today, and see what door that opens for your business!

