Today we’ll be sharing a valuable feature that will save you time and energy when recording videos for Instagram. By the end of this video, you’ll learn how to use Effects and Augmented Reality filters to gain a confidence boost on camera.
These filters are not only fun to use but can also be a game-changer for business owners, especially those of us that didn’t grow up with a camera in their face.
What’s in this blog post:
- Before We Begin
- Where to Access Filters
- Our Favorite Instagram Filters
- How to Save Filters for Later
Important Notice
Now it is so important for me to share my take on this – do not take this as a message that you NEED to use filters. I come as I am, ALL THE TIME… hats, and dirty hair, and all. I think you should do what you feel comfortable with! Whatever is best for you is what is best!
These filters can be a confidence booster for those moments when you want to hop on camera without worrying too much about your appearance. And don’t worry, you don’t have to use filters that drastically change your face.
They all will still look like YOU, which is the most important thing.
Where to Access Effects and Filters
When you are inside of Reels, you can access the effects icon, which looks like stars on the screen. You can also find them near the record button in the lower half of the screen.
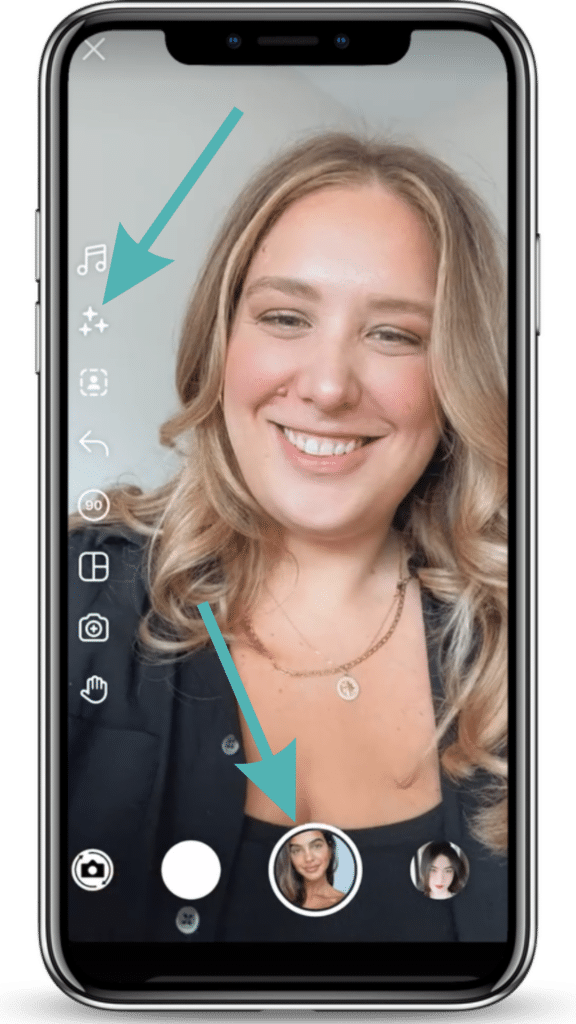
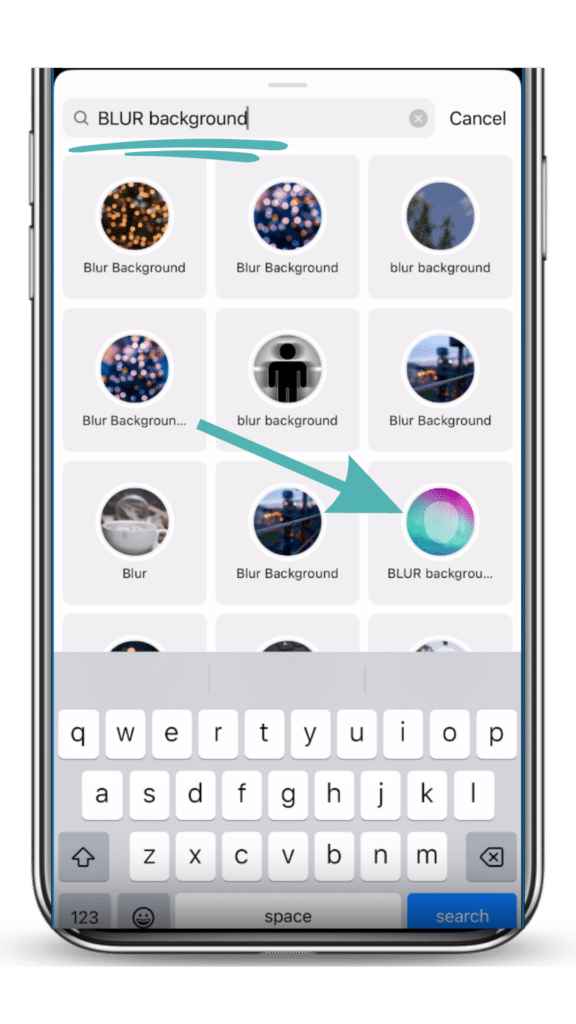
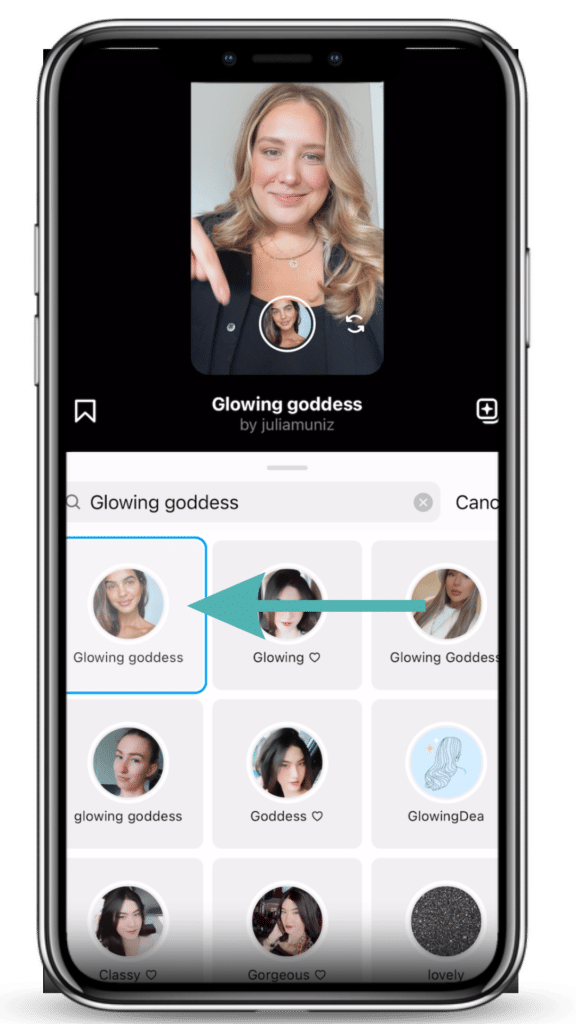
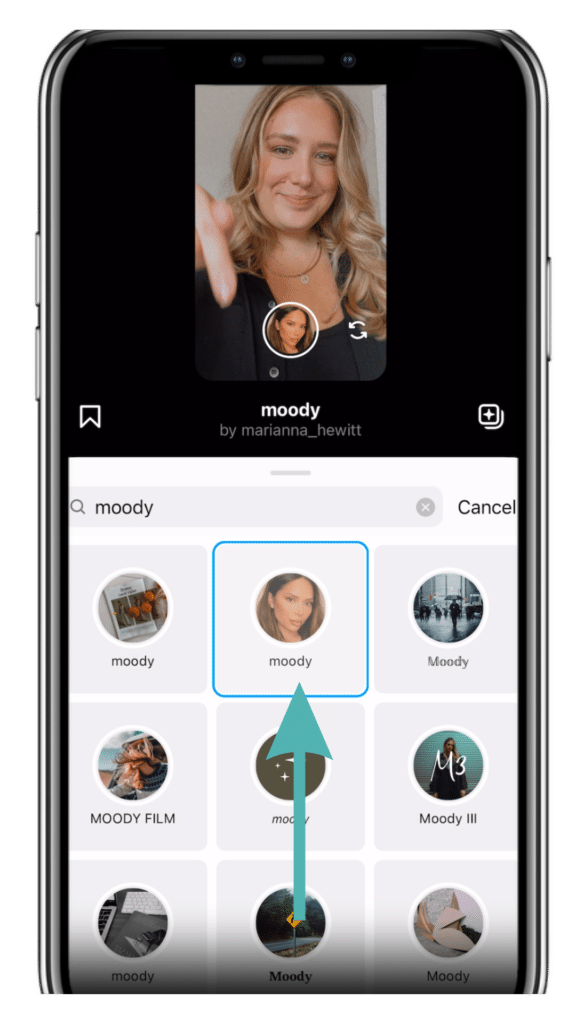
When you tap on the effects button, there is a search function icon in the middle on the left hand side.

You’ll see other menu options on that bar too if you want to see some filters that are recommended for you. If you click that search icon spotlight you can type in the name of some of the filters Morgan is going to show you below in this blog post! Feel free to try them out as we go along.
Our Favorite Instagram Filters
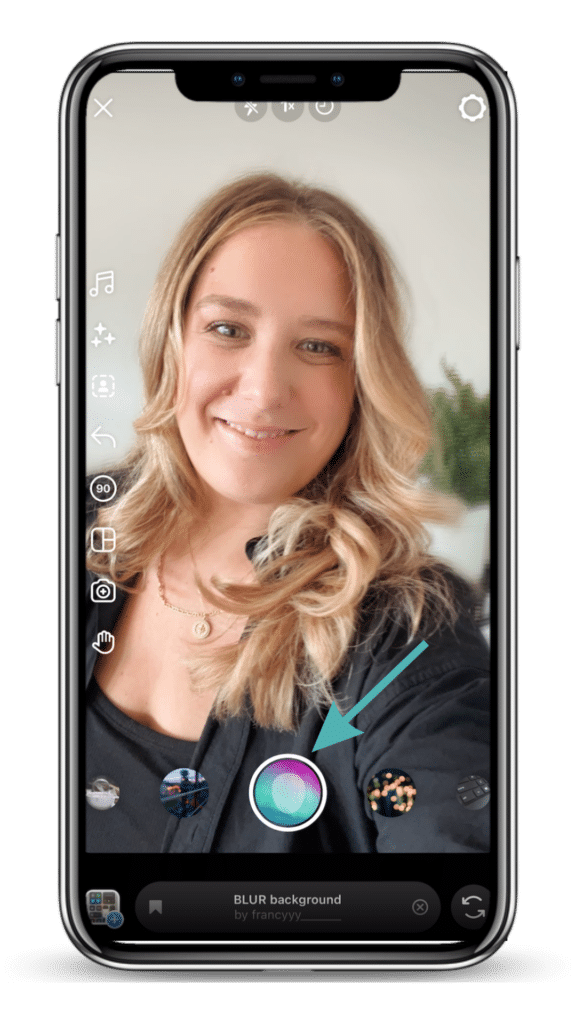
Blur background by francyy_______: This filter allows you to save time by blurring your background. If you have a messy office or you’re in a location you don’t want to disclose, this filter keeps the focus on you.
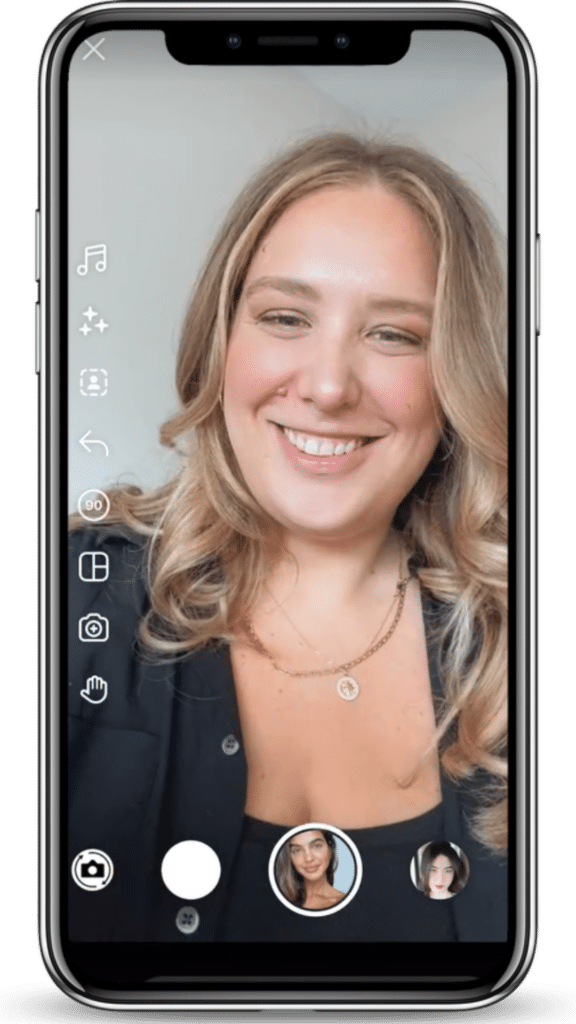
Glowing goddess by juliamuniz: This filter gives you a flush and brightening effect without altering the shape of your face.
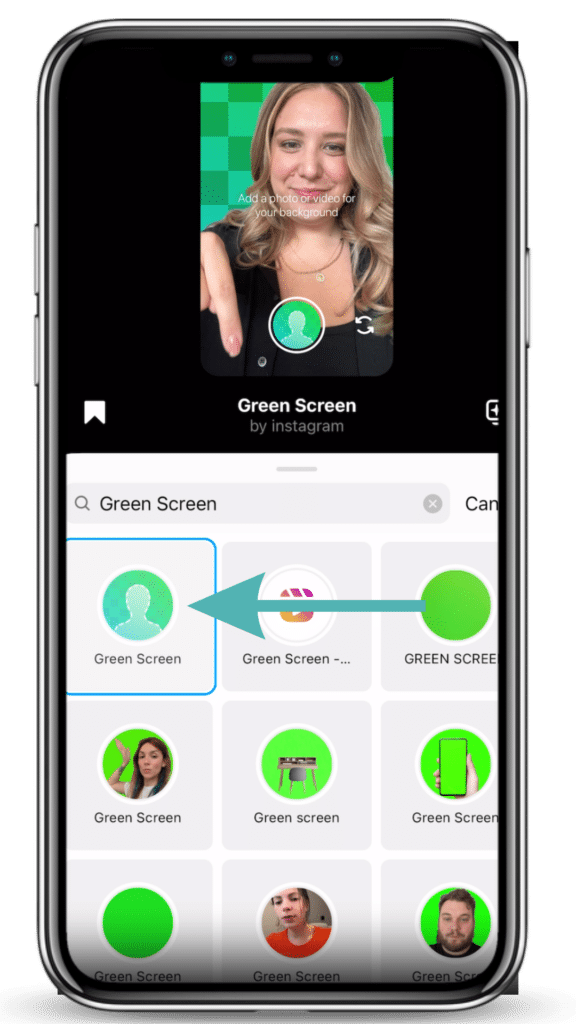
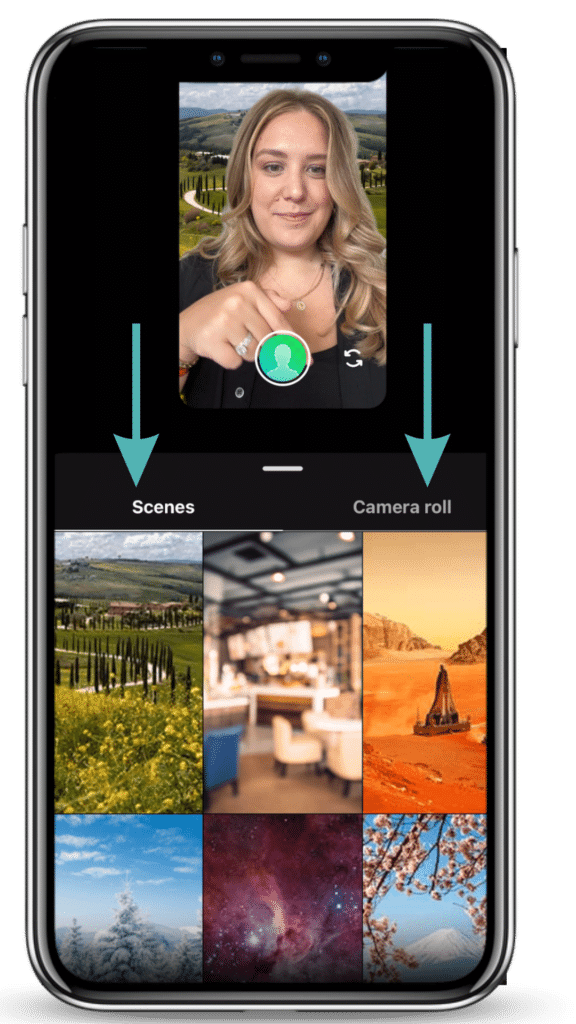
Green Screen by Instagram: With this effect, you can showcase any image from your phone as your background. Just tap the add media button to pick something from your camera roll. Tap the Change Background button to change the background with a new image. Keep in mind your positioning on screen to avoid blocking what you want to capture.

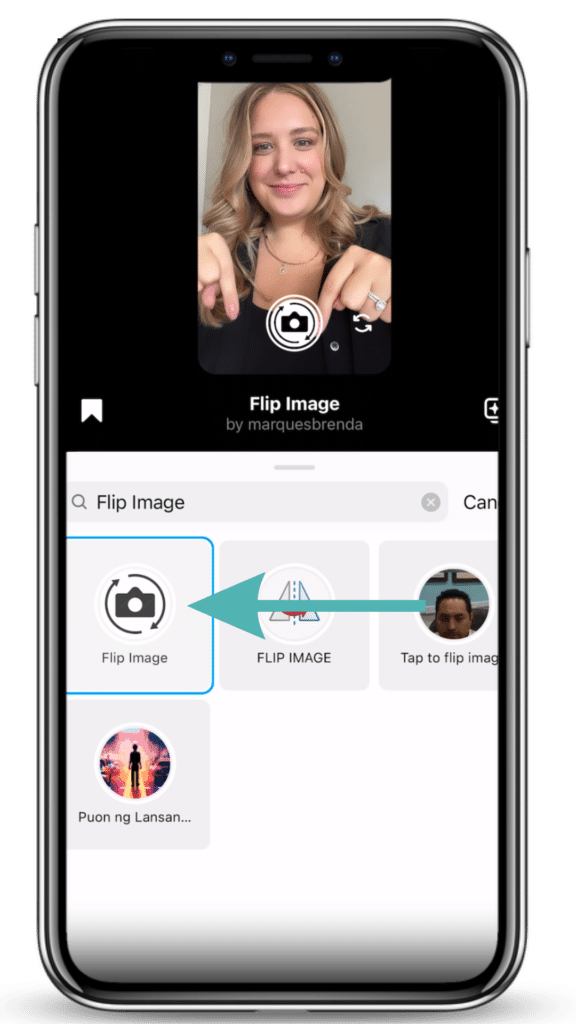
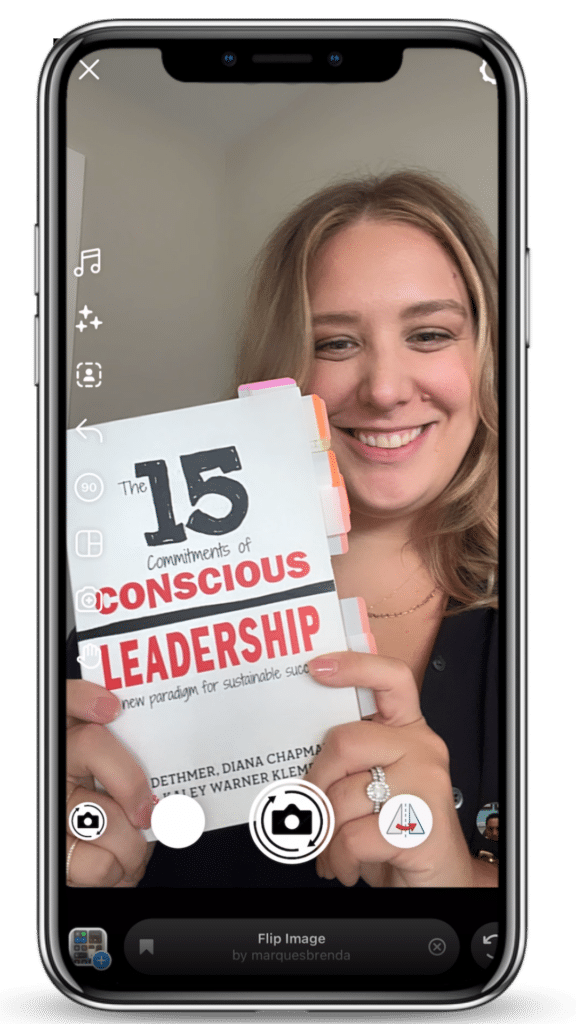
Flip image by marquesbrenda: Use this filter when you want to show video with writing on it, like a book or a legible t-shirt design.
Moody by marianna_hewitt: This filter adjusts the lighting, giving a touch of bronze and contour without changing your face’s shape or making it look overly edited.
Saving and Playing
Once you’ve applied a filter, tap on the save icon, which looks like a ribbon, to keep it handy for future use.
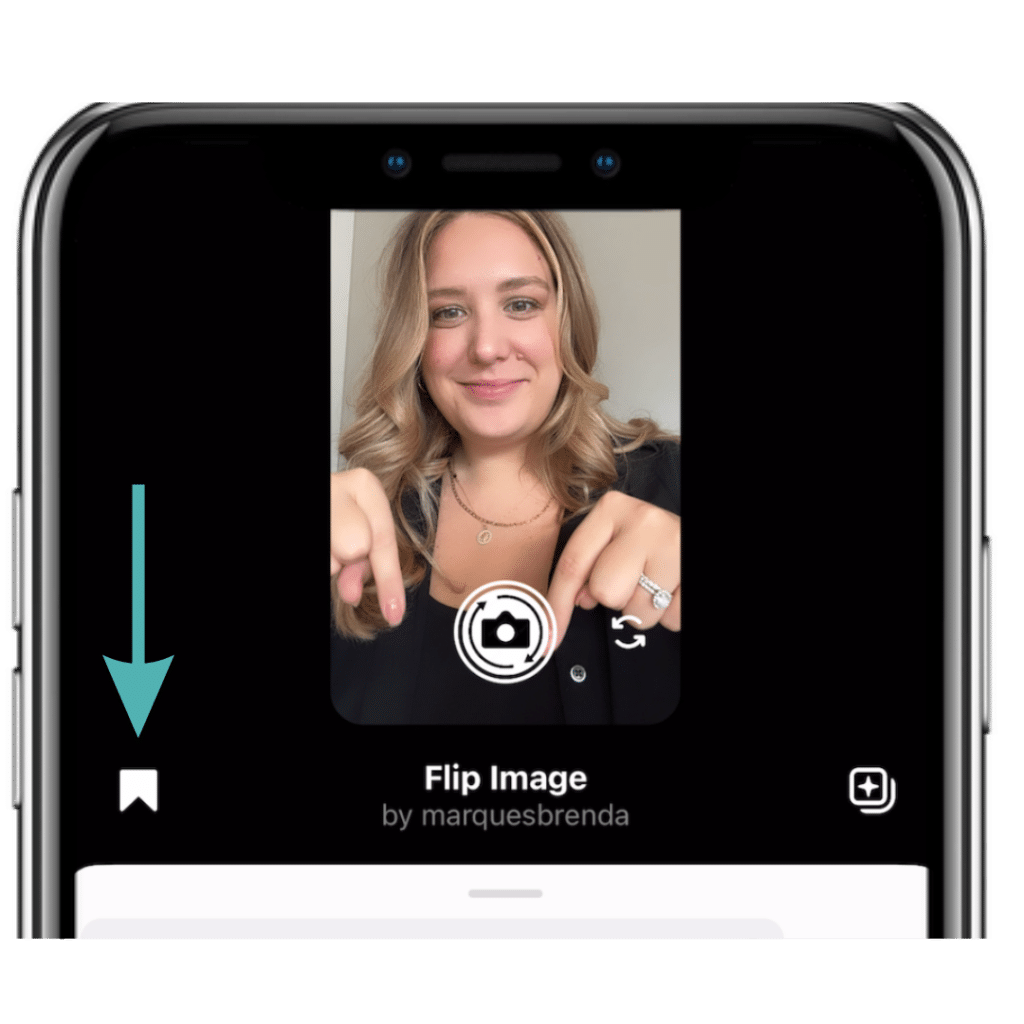
Take some time to play around and notice how these filters make recording videos just a little bit easier.
Tell me in the comments, which filter are you going to try first?
Conclusion
Now if you want more button by button instruction from us all about Reels – then I know your next right step…register for our upcoming workshop!
It is a step by step instagram reels workshop. On the call, We’ll work together LIVE so you can go from frustrated to empowered…even if using video or posting Reels is BRAND NEW to you. Click the link to grab your seat. We can’t wait to work with you!
Okay, There you have it, peeps! Using Effects and Augmented Reality filters in your Instagram Reels can save you time and give you a confidence boost on camera.
Your time is valuable, so make the most of it with these fantastic filters. Thanks for reading!


